How to Dub a Video Into Another Language (2026 Guide)
Dubbing used to mean a recording booth, a cast of voice actors, and a translation budget. Now you can take a finished video in one language and produce a spoken version in another in a single afternoon, with a natural AI voice that you choose. Voice Creator Pro runs every step of dubbing, transcribing, translating, generating the audio, syncing it to the footage, lip sync, and subtitles, in one pipeline with a few clicks.
This guide walks through the full workflow: what dubbing actually involves, how automatic AI dubbing differs from the manual route, the step by step process, how to dub into specific languages like Hindi, and how to keep the original speaker's voice across languages.
What does it mean to dub a video?
Dubbing replaces the original spoken audio in a video with a new voice track in a different language, timed to the footage so viewers hear the content in their own language. When you watch a foreign film "dubbed" rather than "subbed," the original dialogue has been re-voiced: the actors' mouths move to one language while you hear another.
That is the difference from subtitles. Subtitles add translated text on screen and keep the original audio. Dubbing changes the audio itself. Many creators do both, captions for accessibility and sound-off viewing, plus a dubbed audio track for full localization.
Traditional movie dubbing is a studio process: translators adapt the script, a director casts voice actors, and the talent performs each line to match the timing of the original. AI dubbing collapses that pipeline into software. You still make creative choices, which voice, which language, how tightly to match the lip movement, but the transcription, translation, and voice generation happen automatically.
Why dub your videos?
Subtitles let people read your video in another language. Dubbing lets them watch it without reading, and that changes how far the content travels.
- Reach a global audience. Most viewers prefer content in their own language, and many will not watch a video they have to read along to. A dubbed version opens your video to markets that subtitles alone do not fully convert.
- Hold attention. Audio in the viewer's language keeps their eyes on the footage instead of on a caption line, which tends to mean longer watch time, especially on mobile and short-form.
- Repurpose one video into many. Instead of re-shooting or re-recording for each market, you dub the same source into several languages and ship a localized version of each.
- Grow on multi-language platforms. YouTube supports multiple audio tracks on a single video, so one upload can serve viewers in different languages from the same link. See How to Add Subtitles and Dubbing to YouTube Videos for the platform specifics.
- Do it without a studio. What used to need translators, voice talent, and booking time now fits into an afternoon, so localization is worth doing even for routine content like tutorials, courses, and product videos.
Manual dubbing vs automatic (AI) dubbing
Both produce a dubbed video. They trade off in very different places.
| Manual studio dubbing | Automatic AI dubbing | |
|---|---|---|
| Turnaround | Days to weeks | Minutes to hours |
| Cost | Translator, director, voice talent, studio time | Software subscription or a one-time app |
| Languages | Limited by talent you can hire | Many languages from one tool |
| Voice control | A different actor per language | Pick or clone a voice, reuse it everywhere |
| Best for | Feature films, prestige releases, large budgets | Creators, courses, marketing, social, fast turnarounds |
| Main risk | Slow and expensive | Translation timing and delivery need a review pass |
For a Hollywood feature, a full human dub is still the gold standard. For tutorials, courses, product videos, social clips, and most online content, automatic dubbing gets you a finished, natural result at a fraction of the time and cost, and you keep control over the voice.
How to dub a video into another language with Voice Creator Pro
Voice Creator Pro runs the whole pipeline, transcription, translation, voice generation, syncing, lip sync, and subtitles, so dubbing comes down to four steps.
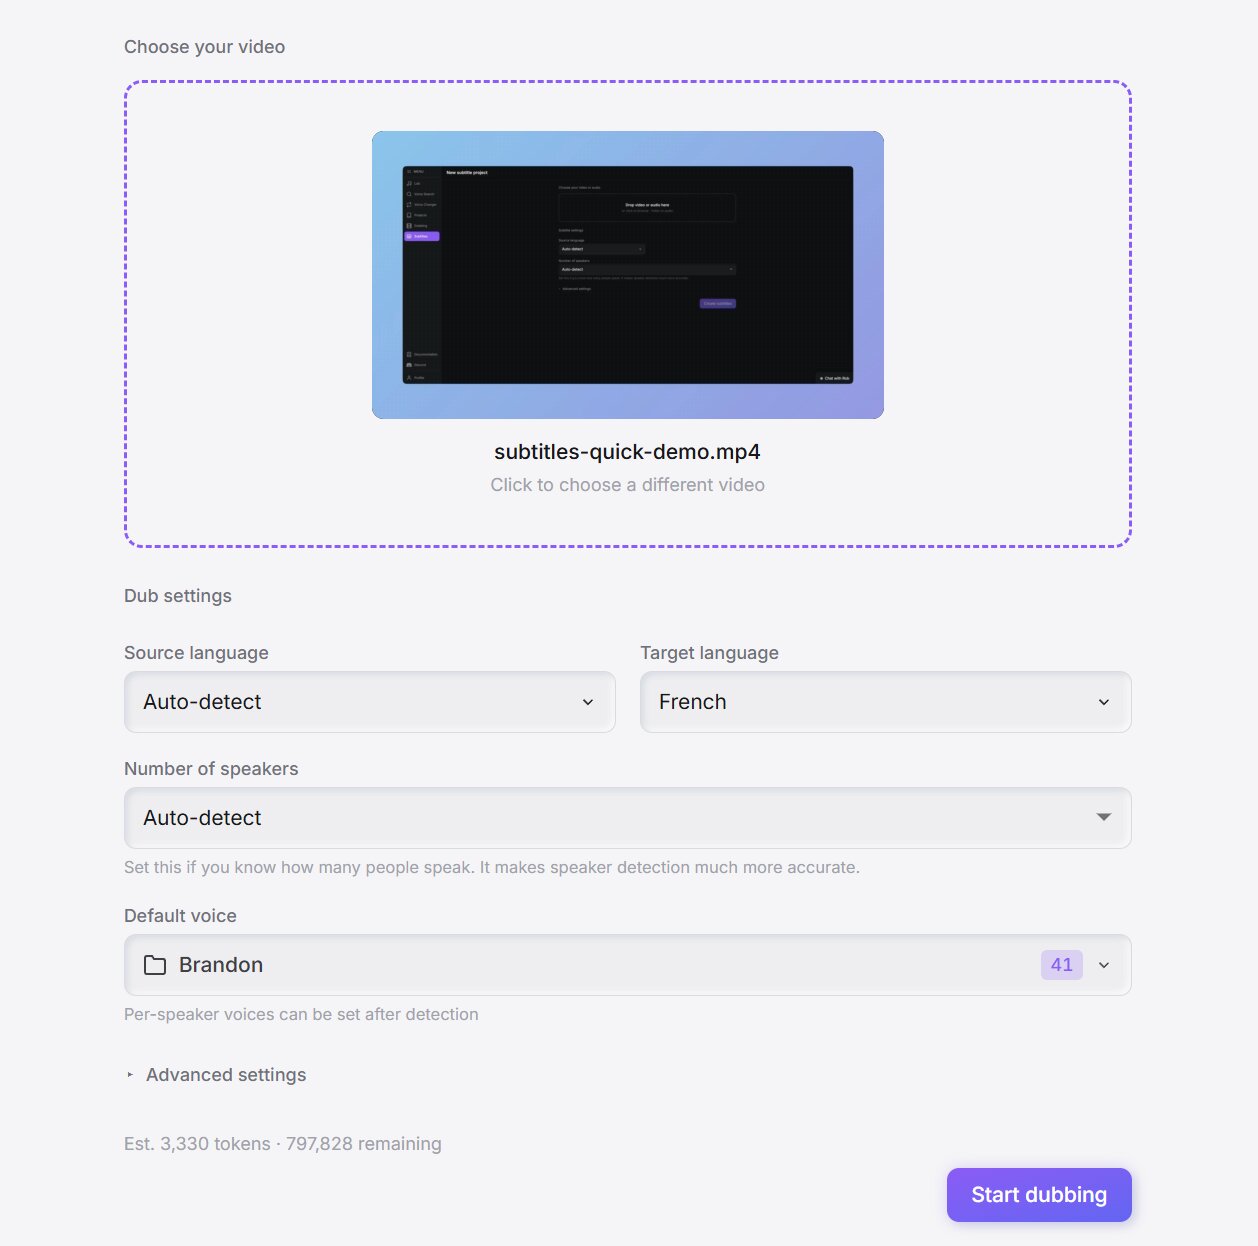
1. Upload your video
Import your finished video and choose the language you want to dub it into. Voice Creator Pro reads the audio, transcribes it, and prepares the project. It supports 21 languages, so this is also where you decide which market you are localizing for.
2. Generate the dub
Start the dub and, if your video has more than one person talking, assign a voice to each speaker, from the built-in library, a voice you designed, or one you cloned. This is also where you choose whether to turn on lip sync.
Lip sync is only worth using for talking-head video, or any shot where the speaker's face is to the camera, since it matches their mouth movements to the dubbed language. For voiceover, b-roll, or footage where the speaker is off screen, leave it off; it adds processing time without changing what the viewer sees. With your choices set, Voice Creator Pro translates the script and generates the dubbed audio for every line.
Translations rarely come out the same length as the original, so a line can expand or contract once it changes language. Voice Creator Pro adjusts the audio length to fit, speeding up or slowing the delivery so the dubbed lines stay matched to the footage, which means you do not have to obsess over timing. Still give it a review pass, and if a line reads awkwardly you can edit the transcription or translation and regenerate that segment.
3. Add subtitles
Once the dub is generated, add subtitles. They are built from the translated transcript, so they already match the new audio, and you can style them with caption or karaoke-style highlighting, background boxes, and font control to match your channel.
4. Listen, regenerate, and export
Play the dubbed video through and check each line. If a single segment does not sound right, regenerate just that one without re-running the whole video, audition a couple of takes, and keep the best. When you are happy, export in whichever format you need:
- A finished video with the new audio, lip sync, and burned-in subtitles, ready to upload.
- SRT or VTT sidecar files if you would rather keep the subtitles separate and add them in your own editor.
- The subtitles as a transparent overlay video (.mov or .webm) to drop straight onto your existing footage.
Dubbing into specific languages
Voice Creator Pro dubs into 21 languages, including Hindi, Spanish, French, German, Japanese, Korean, Chinese, and Arabic.
A few things matter more in some languages than others:
- Script and length. Hindi (Devanagari) and other scripts can expand or contract relative to the source. Voice Creator Pro fits the audio to the footage automatically, so the timing holds up, but read the translated lines and adjust any that come out awkward.
- Numbers and names. Brand names, place names, and numbers are where machine translation slips. Skim those specifically.
- Voice fit. Pick a voice that sounds native to the target language rather than an English voice reading translated text, so the delivery reads as natural to local viewers.
Keeping the original speaker's voice
A common goal is to translate the video but keep it sounding like the same person, so your presenter sounds like themselves in Hindi, Spanish, or Japanese. This is possible with voice cloning, but it is a deliberate step, not something dubbing does for you automatically.
The workflow is: clone the speaker's voice first, then assign that cloned voice to their speaker during dubbing. Voice Creator Pro's cloning is zero-shot, so it captures a voice from a short reference clip (3 to 10 seconds of clean audio). Once the clone exists in your library, you pick it for that speaker and every translated line comes out in their voice.
Two things to keep in mind. First, only clone a voice you have the right to clone, your own, or one you have explicit permission to use. Second, the clone quality depends on the reference clip, so a clean, single-speaker sample matters.
For the details, see Getting Started with Voice Cloning and How to Pick Reference Audio for Voice Cloning.
Tips for a natural-sounding dub
Getting from a rough dub to one that feels native comes down to timing and a clean mix:
- Let the tool handle timing, then spot-check it. Voice Creator Pro fits the audio to the footage when a translated line expands or contracts, so most lines land on their own. If one still feels rushed, shorten the wording and regenerate just that segment.
- Mind the pauses. Natural pauses between sentences help the pacing match the original, so keep complete sentences rather than fragments.
- Use lip sync only where the face is on camera. For talking-head shots it sells the dub; for b-roll and off-screen narration it does nothing, so leave it off (see step 2).
- Duck the original music and effects. If your source has a music bed, lower it under the new dialogue so the dubbed voice sits clearly on top.
Common dubbing pitfalls (and how to avoid them)
- An awkward translation you never reviewed. Voice Creator Pro fits the audio to the footage, but it cannot catch a clumsy phrasing or a mistranslated name. Read the translated lines and fix the ones that read wrong before you export.
- Robotic delivery. If the voice sounds flat, it is usually the wrong model or unnatural pacing rather than the dub itself. See Why TTS Sounds Robotic and How to Fix It.
- Wrong speaker mapping. In a multi-speaker video, double-check that each voice is assigned to the right person before you generate the whole thing.
- Skipping the review pass. Automatic does not mean unattended. Listen through once, regenerate the weak lines, and only then export.
Where to dub your videos
You can dub a video on the Voice Creator Pro desktop app, which runs the whole pipeline locally on your own hardware with unlimited generations and works offline, or in Voice Creator Pro Cloud from any browser. Video dubbing is part of the paid Cloud plans (Starter from $5/month), so if you want to dub in the browser rather than install the app, you will need a Cloud plan rather than the free tier. Either way, the videos you produce are yours to use commercially, with no extra licensing.